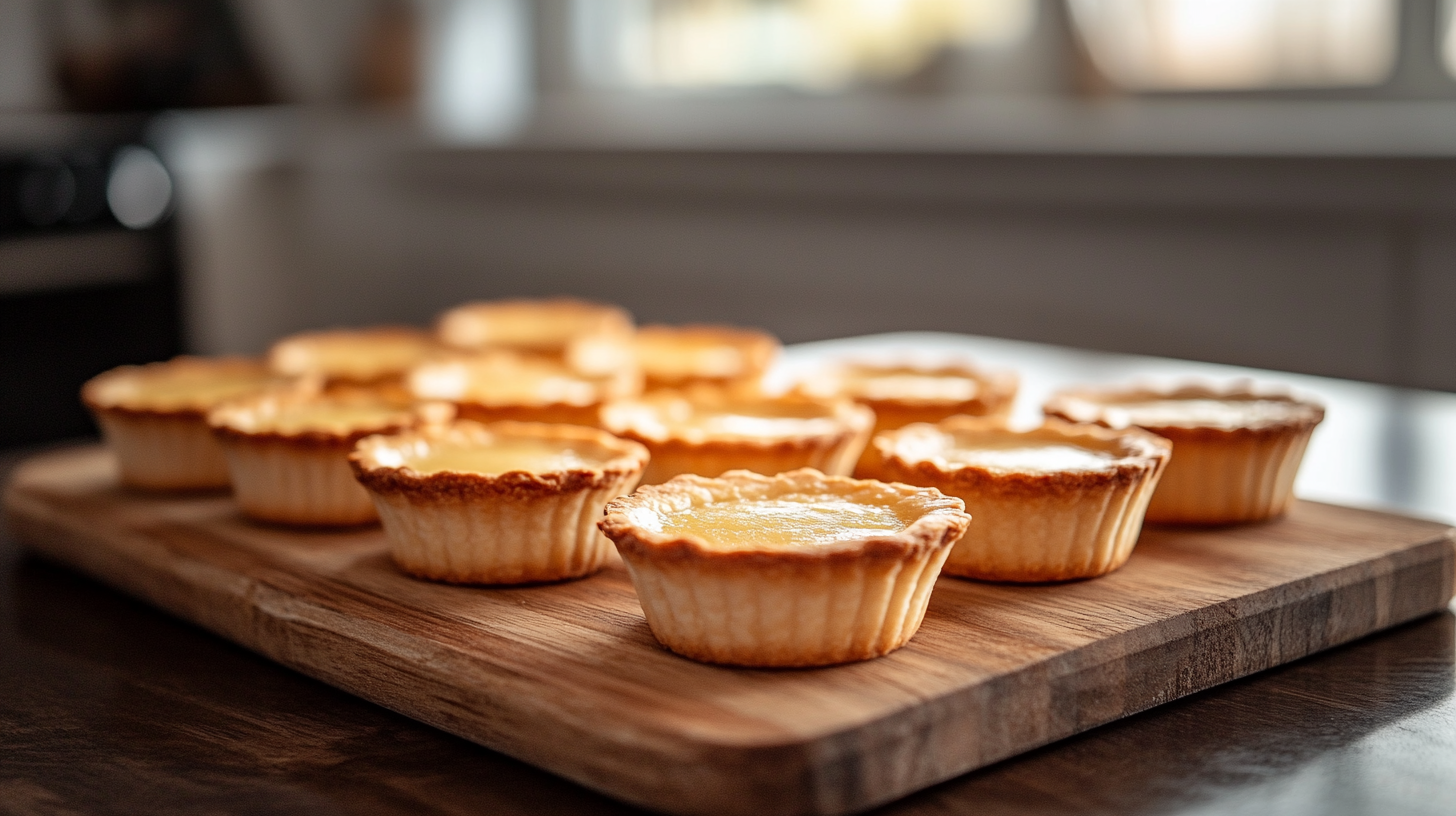
Introduction to Mini Tart Shells
Mini tart shells are small, crisp pastry cases designed to hold various fillings. They can be made using different types of dough, such as shortcrust pastry, pâte sucrée (sweet dough), or even phyllo dough. Their versatility makes them perfect for serving at parties, afternoon teas, or elegant desserts.
Why Mini Tart Shells Are Popular
Several factors contribute to the popularity of mini tart shells:
- Versatility – They can be filled with custard, fruit, chocolate, or even savory ingredients like cheese and vegetables.
- Perfect Portion Size – Mini tarts are easy to serve and eat, making them ideal for gatherings.
- Aesthetic Appeal – Their delicate, professional appearance enhances any dessert table.
- Make-Ahead Friendly – You can prepare and store them in advance, making party planning easier.
Types of Dough for Mini Tart Shells
There are severals types of dough that can be used for mini tart shells:
- Shortcrust Pastry – A buttery and flaky dough, ideal for both sweet and savory tarts.
- Pâte Sucrée – A slightly sweetened dough that creates a crisp and tender shell.
- Phyllo Dough – A lighter, flakier option that works well with both sweet and savory fillings.
- Puff Pastry – Provides a rich, airy texture but is less commonly used for tarts.
No matter which dough you choose, properly baking mini tart shells ensures they remain crisp and flavorful.
Ingredients for Mini Tart Shells
To create the perfect mini tart shells, you need high-quality ingredients. The basic recipe requires simple pantry staples, but small variations can enhance the flavor and texture.
Basic Ingredients for Mini Tart Shells
- All-Purpose Flour (1 ½ cups) – Provides the structure for the tart shells.
- Unsalted Butter (½ cup, cold and cubed) – Adds richness and a flaky texture.
- Granulated Sugar (2 tablespoons) – Slightly sweetens the dough.
- Salt (¼ teaspoon) – Balances the sweetness and enhances flavor.
- Egg Yolk (1 large) – Helps bind the ingredients and adds richness.
- Ice Water (2-3 tablespoons) – Helps bring the dough together without making it too sticky.
Optional Ingredients for Enhanced Flavor
- Vanilla Extract (½ teaspoon) – Adds a hint of sweetness and depth.
- Almond Flour (¼ cup) – Improves texture and adds a nutty taste.
- Cocoa Powder (2 tablespoons) – For chocolate-flavored tart shells.
- Lemon Zest (1 teaspoon) – Adds a fresh citrus aroma.
Ingredient Substitutions
If you have dietary restrictions, you can make adjustments:
- For Gluten-Free Mini Tart Shells – Use a gluten-free flour blend instead of all-purpose flour.
- For Vegan Mini Tart Shells – Replace butter with coconut oil or vegan butter, and substitute the egg yolk with a flaxseed egg.
- For a Healthier Version – Use whole wheat flour instead of refined flour and reduce the sugar.
By carefully selecting the right ingredients, you can customize mini tart shells to suit different tastes and dietary needs.
Tools Needed for Preparation
To ensure your mini tart shells turn out perfect, having the right tools is essential. Using proper equipment not only makes the process easier but also ensures a professional finish.
Essential Baking Tools
- Mixing Bowls – For combining and kneading the dough.
- Pastry Cutter or Food Processor – Helps incorporate butter into the flour efficiently.
- Rolling Pin – Used to roll out the dough evenly.
- Mini Tart Pans or Muffin Tin – Provides structure and shapes the tart shells.
- Fork or Docking Tool – Used to poke holes in the dough to prevent puffing.
- Baking Weights or Dried Beans – Help keep the tart shells flat while baking.
- Sharp Knife or Pastry Cutter – Ensures clean edges when cutting the dough.
Additional Useful Tools
- Silicone Baking Mat or Parchment Paper – Prevents sticking and makes cleanup easier.
- Pastry Brush – Helps apply egg wash or melted butter for added shine.
- Bench Scraper – Useful for handling and cutting dough cleanly.
Why Proper Tools Matter
Using the correct tools can:
- Improve the consistency and texture of the dough.
- Make shaping and baking mini tart shells easier.
- Ensure an even bake for a crisp and golden shell.
Investing in high-quality baking tools will help you create perfect mini tart shells every time.
Step-by-Step Guide to Mini Tart Shells
Mastering mini tart shells requires careful preparation and baking techniques. Follow these steps to achieve a perfectly crisp, golden-brown shell ready for any filling.
Preparing the Mini Tart Shells
Before assembling and baking, the dough must be properly prepared to ensure the best texture and flavor.
1: Mixing the Dough
- In a large mixing bowl, whisk together 1 ½ cups of all-purpose flour, 2 tablespoons of granulated sugar, and ¼ teaspoon of salt.
- Add ½ cup of cold, cubed unsalted butter and use a pastry cutter or food processor to blend until the mixture resembles coarse crumbs.
2: Adding the Liquid Ingredients
- Mix in 1 large egg yolk to bind the dough.
- Gradually add 2-3 tablespoons of ice water, one spoon at a time, mixing just until the dough starts to come together.
- Avoid overmixing, as this can make the pastry tough.
3: Chilling the Dough
- Shape the dough into a flat disc and wrap it in plastic wrap.
- Refrigerate for at least 30 minutes to allow the gluten to relax and prevent shrinkage during baking.
Chilling the dough is essential for maintaining a tender, flaky texture in the final mini tart shells.
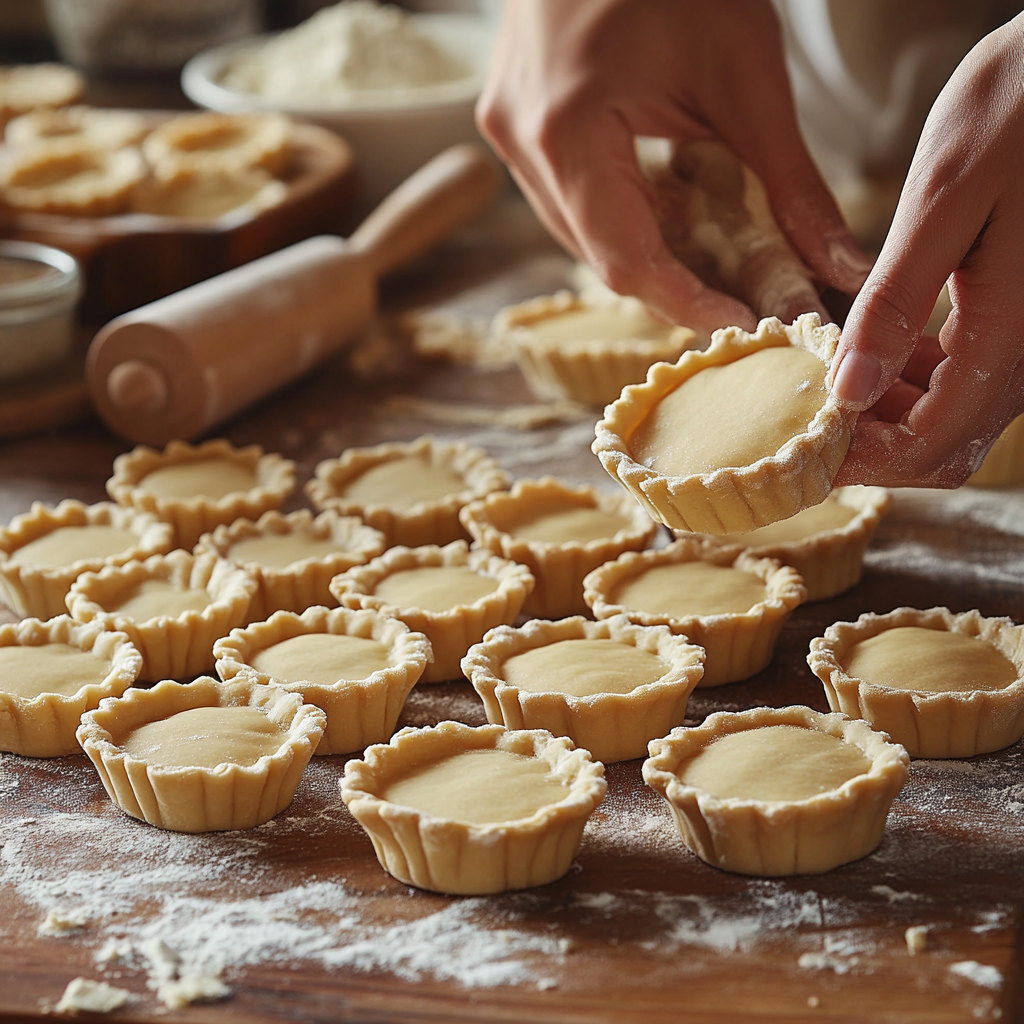
Assembling the Mini Tart Shells
Once the dough is chilled, it’s time to shape and pre-bake the mini tart shells.
1: Rolling and Cutting the Dough
- Lightly flour a clean surface and roll out the dough to about ⅛ inch thickness.
- Use a cookie cutter or a round glass to cut out circles slightly larger than your tart molds.
2: Fitting the Dough into Molds
- Gently press each dough circle into a mini tart pan or muffin tin, making sure the edges are even.
- Trim any excess dough and press lightly to ensure a snug fit.
3: Docking the Dough
- Use a fork to poke small holes in the bottom of each tart shell. This prevents the dough from puffing up during baking.
4: Pre-Baking the Tart Shells
- Line each tart shell with a small piece of parchment paper and fill with baking weights or dried beans.
- Bake in a preheated oven at 350°F (175°C) for 10-12 minutes.
- Remove the parchment paper and weights, then bake for another 5-7 minutes until golden brown.
Once baked, allow the mini tart shells to cool completely before adding fillings.
Serving Suggestions
Once your mini tart shells are baked and cooled, they can be filled with a variety of delicious ingredients.
Sweet Fillings
- Classic Fruit Tart – Fill with vanilla pastry cream and top with fresh berries.
- Chocolate Ganache Tart – Pour in a melted chocolate ganache and let it set.
- Lemon Curd Tart – Add a tangy lemon curd and garnish with zest.
- Caramel Pecan Tart – Fill with caramel sauce and toasted pecans for a rich, nutty treat.
Savory Fillings
- Mini Quiche – Combine whisked eggs, cheese, and vegetables for a bite-sized quiche.
- Brie and Cranberry Tart – Melt brie cheese inside and top with cranberry sauce.
- Caramelized Onion and Goat Cheese Tart – A perfect balance of sweet and tangy flavors.
- Smoked Salmon Tart – Fill with cream cheese, smoked salmon, and fresh dill.
Presentation Tips
- Garnish with fresh herbs or edible flowers for an elegant touch.
- Dust sweet tarts with powdered sugar for a professional finish.
- Serve with sauces like chocolate drizzle, caramel, or fruit coulis for extra flavor.
Whether served as a dessert or an appetizer, mini tart shells offer endless possibilities for creative presentations.
Variations of the Recipe
While classic mini tart shells are made using shortcrust pastry, there are many variations to suit different tastes and dietary needs. By modifying the ingredients and techniques, you can create a variety of textures and flavors.
Sweet Variations
- Chocolate Mini Tart Shells – Replace 2 tablespoons of flour with cocoa powder for a deep chocolate flavor.
- Almond Tart Shells – Substitute ¼ cup of flour with almond flour for a nuttier taste and crisp texture.
- Honey or Maple-Flavored Shells – Swap granulated sugar with honey or maple syrup for a natural sweetness.
- Coconut Tart Shells – Mix in ¼ cup shredded coconut for a tropical twist.
Savory Variations
- Cheese-Infused Tart Shells – Add ¼ cup of grated Parmesan or cheddar to the dough for a rich, savory shell.
- Whole Wheat Tart Shells – Use whole wheat flour instead of all-purpose flour for a healthier, fiber-rich option.
- Herb-Infused Tart Shells – Mix in chopped rosemary, thyme, or basil for added flavor.
- Gluten-Free Tart Shells – Use a gluten-free flour blend to make the recipe suitable for gluten-sensitive individuals.
Dietary Substitutions
- Vegan Version – Replace butter with coconut oil or vegan butter and use a flax egg (1 tbsp flaxseed meal + 3 tbsp water).
- Keto-Friendly Option – Use almond flour and coconut flour instead of regular flour and swap sugar with erythritol.
These variations allow you to customize your mini tart shells to fit different preferences and dietary needs.
Common Mistakes and How to Avoid Them
Even experienced bakers can make mistakes when preparing mini tart shells. Here are some of the most common issues and how to fix them.
1. Dough Shrinks During Baking
- Cause: The dough wasn’t chilled long enough.
- Solution: Refrigerate the dough for at least 30 minutes before rolling it out. Avoid overworking the dough.
2. Tart Shells Puff Up in the Oven
- Cause: The dough wasn’t docked (pricked with a fork).
- Solution: Always prick holes in the base and use baking weights or dried beans to keep the shells flat.
3. Shells Are Too Hard or Tough
- Cause: Overmixing the dough or adding too much flour.
- Solution: Mix the dough just until it comes together and use ice-cold butter for a tender texture.
4. Uneven Baking or Browning
- Cause: The oven temperature is inconsistent.
- Solution: Preheat the oven properly and rotate the tart shells halfway through baking.
5. Soggy Tart Bottoms
- Cause: Not pre-baking the shells before adding wet fillings.
- Solution: Blind bake the shells for 10-12 minutes before filling them.
Avoiding these mistakes will ensure that your mini tart shells turn out perfectly every time.
Nutritional Benefits of Mini Tart Shells
While mini tart shells are often seen as a treat, they can be part of a balanced diet when made with wholesome ingredients.
1. Provides Energy
- The flour and butter in tart shells provide carbohydrates and fats, which are essential energy sources.
2. Good Source of Healthy Fats
- Using almond flour, coconut oil, or whole wheat flour increases the proportion of healthy fats and nutrients.
3. Customizable for Nutritional Needs
- For a fiber-rich option, use whole wheat or oat flour.
- For a protein boost, add ground nuts or seeds to the dough.
4. Lower Sugar Alternatives
- Replacing sugar with honey or maple syrup provides natural sweetness with additional vitamins and minerals.
By making simple ingredient swaps, you can turn mini tart shells into a more nutritious snack or meal component.
Pairing Mini Tart Shells
The beauty of mini tart shells lies in their ability to complement a wide range of flavors. Whether you’re making sweet or savory versions, pairing them correctly enhances their appeal.
Sweet Pairings
- Beverages:
- Pair fruit-filled tarts with white wine, herbal tea, or fresh juice.
- Chocolate tarts go well with coffee, red wine, or dark tea.
- Toppings:
- Add whipped cream, toasted nuts, or fresh mint for extra flavor and texture.
Savory Pairings
- Cheese-Based Tarts – Serve with light-bodied white wine or sparkling water with lemon.
- Meat or Seafood Tarts – Pair with rosé or dry white wines.
- Vegetable-Based Tarts – Complement with green tea, fresh lemonade, or citrus-infused water.
Pairing tart shells thoughtfully ensures a well-balanced and satisfying dining experience.
FAQs About Mini Tart Shells
Here are some common questions about making mini tart shells.
Mini Tart Shells: Uses, Alternatives, and Baking Tips
Mini tart shells are a versatile pastry essential, perfect for both sweet and savory creations. Whether you’re wondering how to use them, what to substitute for tart tins, or whether blind baking is necessary, this guide covers everything you need to know.
What to Do with Mini Tart Shells?
Mini tart shells can be used in a variety of ways, making them a staple for any baker. Here are some delicious ways to fill and serve them:
Sweet Fillings
- Fruit Tarts – Fill with vanilla custard or pastry cream and top with fresh berries.
- Chocolate Ganache Tarts – Pour in rich melted chocolate and let it set.
- Lemon Curd Tarts – Add a tangy lemon curd for a refreshing dessert.
- Mini Cheesecake Bites – Pipe in a no-bake cheesecake mixture and chill before serving.
Savory Fillings
- Mini Quiches – Fill with a mixture of eggs, cheese, and vegetables.
- Goat Cheese & Caramelized Onion Tarts – A perfect appetizer with a sweet-savory balance.
- Brie & Cranberry Tarts – Combine creamy brie cheese with tart cranberry sauce.
- Smoked Salmon Tartlets – Layer cream cheese, smoked salmon, and fresh dill for a gourmet bite.
Other Creative Uses
- Dipping Shells – Serve plain shells with chocolate or caramel sauce for dipping.
- Edible Salad Cups – Fill with fresh greens, feta cheese, and balsamic glaze.
- Ice Cream Cups – Scoop in ice cream and drizzle with syrup for an elegant dessert.
With so many possibilities, tart shells can be tailored to fit any occasion!
What to Use Instead of Mini Tart Tins?
If you don’t have mini tart tins, there are several alternatives you can use to shape and bake mini tart shells.
Best Substitutes for Mini Tart Tins
- Muffin Tins – A common household item that works well for shaping tart shells. Use paper liners for easy removal.
- Cookie Cutters & Baking Trays – Cut the dough into circles and bake them flat on a baking tray for open-faced tart shells.
- Silicone Molds – Flexible and easy to remove, these work great for delicate tart shells.
- Ramekins – Ideal for slightly larger tarts with deeper fillings.
- Aluminum Foil Cups – Shape foil into small cups and place them on a baking tray for a quick DIY tart mold.
Using these alternatives ensures that you can still create perfectly shaped tart shells even without traditional tart tins.
Do I Need to Blind Bake Mini Tartlets?
Yes, blind baking is essential for most mini tart shells, especially when using wet fillings.
Why Blind Bake?
- Prevents Sogginess – Without blind baking, the crust may absorb moisture from the filling, leading to a soft, undercooked base.
- Ensures a Crisp Texture – Baking the shells first helps them hold their shape and stay firm.
- Prepares the Shells for No-Bake Fillings – If your filling doesn’t require baking (e.g., custard or chocolate ganache), blind baking is a must.
How to Blind Bake Mini Tartlets
- Dock the Dough – Use a fork to prick holes in the bottom to prevent puffing.
- Use Baking Weights – Place parchment paper inside the tart shells and fill them with baking weights or dried beans.
- Bake at 350°F (175°C) for 10-12 Minutes – Remove the weights and bake for another 5-7 minutes until golden brown.
If your filling needs further baking (e.g., quiche), blind bake the shells for only half the time before adding the filling.
What Is the Smaller Version of a Tart Called?
The smaller version of a tart is commonly known as a tartlet.
Tart vs. Tartlet
- Tart – A full-sized pastry shell with a filling, often served as a dessert or savory dish.
- Tartlet – A mini-sized tart, typically served as bite-sized appetizers or individual desserts.
Tartlets are perfect for elegant presentations at parties, allowing for easy serving and portion control.
Conclusion: Mini Tart Shells
Mini tart shells are a versatile and elegant base for both sweet and savory fillings. With the right ingredients, tools, and techniques, you can create perfectly crisp tart shells for any occasion.
Key Takeaways
- Choose the right dough type for your desired texture.
- Always chill the dough before rolling to prevent shrinkage.
- Blind baking is essential for a crisp shell.
- Customize the recipe with different flours, flavors, and dietary alternatives.
- Pair fillings with the right drinks and toppings to enhance the experience.
By mastering the basics and experimenting with different variations, you can create delicious and visually stunning mini tart shells that impress every time.
Would you like more tart filling ideas? Let me know, and I’d be happy to share some creative recipes!